Expo Facebook · Providing Login with Facebook
• 12 min read
Preparation
You can type along if you wish. I'll write out each and every step. If you already have an application, you can skip this step altogether.
expo init --template expo-template-blank-typescript --name facebook-loginInstall expo-auth-session
We're going to use [AuthSession][expo-auth-session] to simplify Native Authentication considerably. You could roll your own, but there really is no point. AuthSession works by opening a Web Browser session and a standard to authenticate (in this case OAuth).
expo install expo-auth-sessionInside App.tsx, or wherever I want to configure the Facebook login, I add the following code snippet:
import React from 'react'
import { StyleSheet, Text, View, Platform } from 'react-native'
import {
  useAuthRequest,
  makeRedirectUri,
  AuthRequestConfig,
  DiscoveryDocument
} from 'expo-auth-session'

const discovery: DiscoveryDocument = {
  authorizationEndpoint: 'https://www.facebook.com/v6.0/dialog/oauth',
  tokenEndpoint: 'https://graph.facebook.com/v6.0/oauth/access_token'
}

const config: AuthRequestConfig = {
  clientId: '<YOUR FBID>',
  scopes: ['public_profile', 'user_likes'],
  redirectUri: makeRedirectUri({
    native: 'fb111111111111://authorize'
  }),
  extraParams: {
    display: Platform.select({ web: 'popup' })!
  }
}

export default function App() {
  const [request, response, promptAsync] = useAuthRequest(config, discovery)

  return (
    <View style={styles.container}>
      <Text>Open up App.tsx to start working on your app!</Text>
    </View>
  )
}

const styles = StyleSheet.create({
  container: {
    flex: 1,
    backgroundColor: '#fff',
    alignItems: 'center',
    justifyContent: 'center'
  }
})
The discovery here is a manual configuration that tells the OAuth authentication protocal which endpoints it should call in order to authenticate a user. This is described in detail in the OpenID Discovery Document as well as RFC 8414: OAuth 2.0 Authorization Server Metadata. It might be daunting to read such document if you've never done that, so the short story is that there are certain endpoint an OAuth server needs to expose in order to be able to use OAuth to authenticate.
useAutoDiscovery (not enabled for Facebook at the moment) automatically retrieves these endpoints based on a single URL. Because Auto-Discovery is not implemented for Facebook, we have to manually configure it.
The AuthRequestConfig is the Facebook OAuth configuration, and needs our attention. clientId needs to be replaced, as well as the native redirectUri.
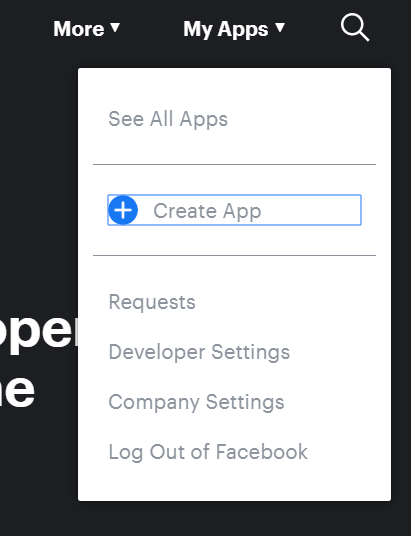
Create the Facebook Application
Browse to developers.facebook.com and create a new application.
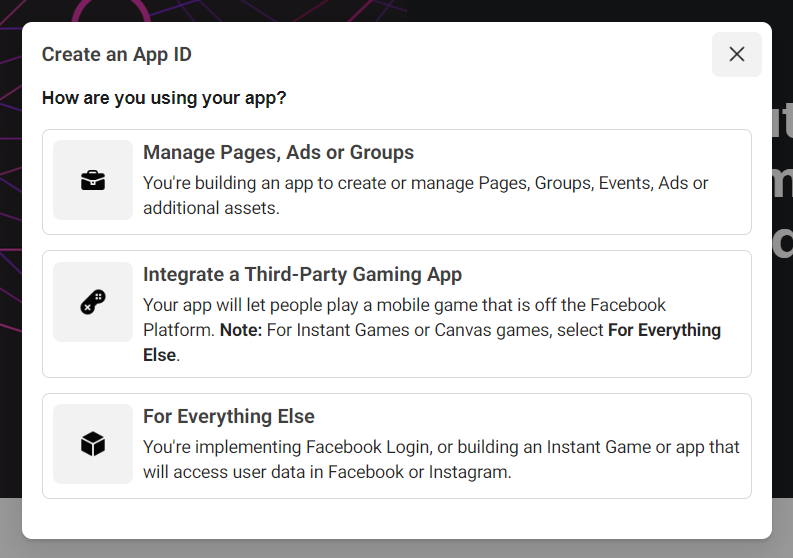
On the popup, pick For Everything Else, unless you're making a mobile game that's not an Instant Game or Canvas Game.
Finally, fill in the App Display Name and App Contact Email:

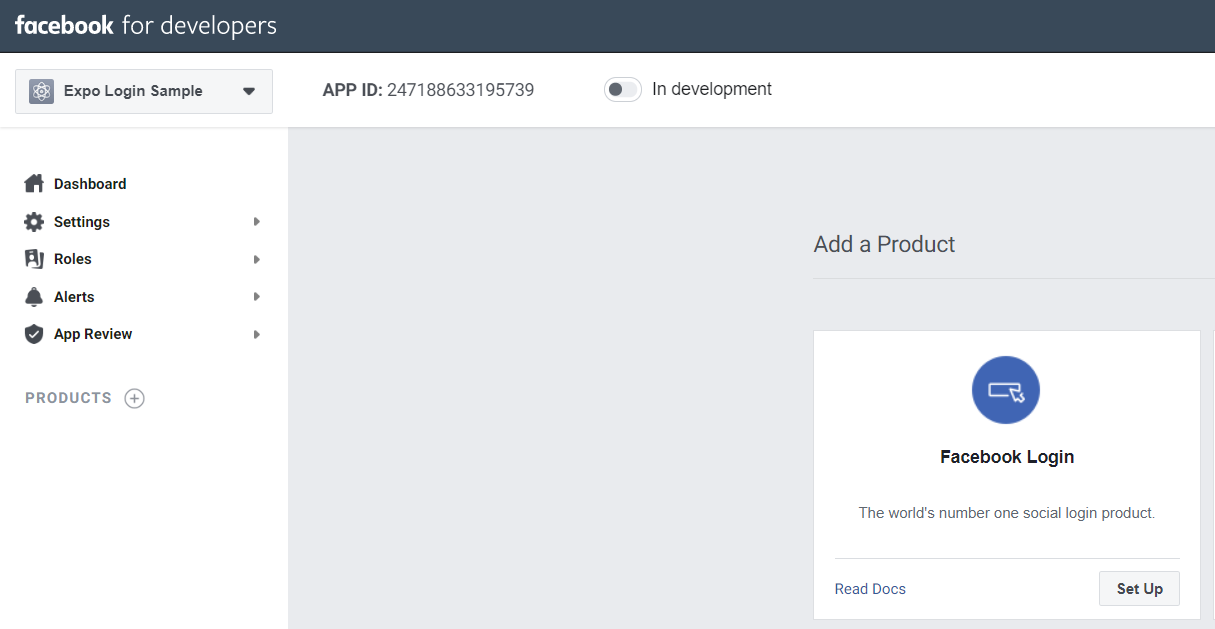
When all proceeds as planned, you're greeted by the following screen, with in the top left your App Display Name and next to that the actual APP ID that you'll need.
Update the configuration
const config: AuthRequestConfig = {
  clientId: '247188633195739',
  scopes: ['public_profile', 'user_likes'],
  redirectUri: makeRedirectUri({
    native: 'fb247188633195739://authorize'
  }),
  extraParams: {
    display: Platform.select({ web: 'popup' })!
  }
}
It is very important that the native redirectUri has the correct structure. If you don't use the correct format or ID before the ://, you'll see:
No redirect URI in the params: No redirect present in URI
If you don't use the correct path of authorize, you'll see:
Can't Load URL: The domain of this URL isn't included in the app's domains. To be able to load this URL, add all domains and subdomains of your app to the App Domains field in your app settings.
Add a login button
In this example, I import Button from react-native and use it to show the login prompt. In your App, use a guideline-branded button instead.
export default function App() {
  const [request, response, promptAsync] = useAuthRequest(config, discovery;

  return (
    <View style={styles.container}>
      <Button onPress={() => promptAsync()} title="Login" />
    </View>
  );
}
Additionally, I'd like to see the response when we come back to the app:
export default function App() {
  const [request, response, promptAsync] = useAuthRequest(config, discovery)

  return (
    <View style={styles.container}>
      <Button onPress={() => promptAsync()} title="Login" />
      <Text>{JSON.stringify(response, undefined, 2)}</Text>
    </View>
  )
}
Test it out
You can now try this out by running yarn start, opening your expo client and load your app.
You'll see a warning in your console:
Linking requires that you provide a
schemein app.json for standalone apps - if it is left blank, your app may crash. The scheme does not apply to development in the Expo client but you should add it as soon as you start working with Linking to avoid creating a broken build. Add aschemeto silence this warning. Learn more about Linking at https://docs.expo.io/versions/latest/workflow/linking/
Clicking on the Login button correctly pops-up the m.facebook.com OAuth (unless you have the Facebook App installed), and displays the following error:
No redirect URI in the params: No redirect present in URI
I just said that this can be caused when the native redirectUri is incorrect, and that is the case. Resolution goes as follows:
Add scheme to app.json
First, open up app.json and add a new "top-level" property scheme:
{
  "expo": {
    "name": "facebook-login",
    "slug": "facebook-login",
    "scheme": "com.derk-jan.facebook-login",
    "platforms": ["ios", "android", "web"],
    "version": "1.0.0",
    "orientation": "portrait"
    /* ... */
  }
}
I suggest the following format: reverse.dns.slug. So, in my case I will use com.derk-jan.facebook-login. It's very unlikely that a reverse domain will cause a conflict with another app, and it's also easier to remember. It's recommended by many guides -- occasionally also by Google and Apple, but it's inconsistent.
This removes the warning, but doesn't enable us to use the login. Why? Because we're using the expo app, which doesn't have our custom "deeplink scheme".
Enable proxy for expo clients
First, install the Expo web browser and constants packages. The first will be used to resume an auth session, when returning to the application; the second will allow us to query if we've launched from the expo client, or a standalone app.
expo install expo-constants expo-web-browserNow add the following code to App.tsx
import { maybeCompleteAuthSession } from 'expo-web-browser';
import Constants from 'expo-constants';

maybeCompleteAuthSession();

const useProxy = Constants.appOwnership === 'expo' && false;
You can find the values for Constants.appOwnership in the documentation. maybeCompleteAuthSession is necessary to test this on the web -- it closes the redirection popup (which we haven't done so far).
Now let's instruct the Linking module to use the proxy:
const config: AuthRequestConfig = {
  clientId: '247188633195739',
  scopes: ['public_profile', 'user_likes'],
  redirectUri: makeRedirectUri({
    native: 'fb247188633195739://authorize',
    useProxy
  }),
  extraParams: {
    display: Platform.select({ web: 'popup' })!
  }
}
If you try to login now, the original error disappears, but Facebook will still complain that the "domain" to redirect to is not a valid/accepted/allowed one (depending on the language settings of your Facebook account).
Add the redirection domain
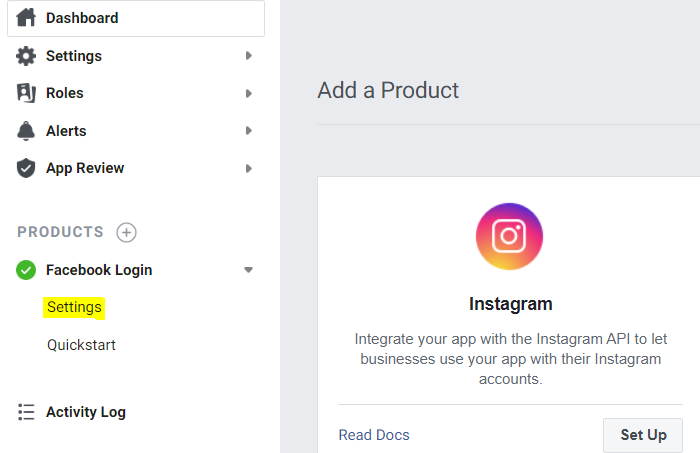
On developers.facebook.com, go to your app and press the Facebook Login button. Now do not press any of the options, but instead on the left side in the menu press Settings:
When you press it, in the top box, find Valid OAuth Redirect URIs and enter the Redirection URI. It will be https://auth.expo.io/@username/slug -- but if you're unsure, you can add the following to App.tsx and copy it from your console:
console.log(
  makeRedirectUri({
    native: 'fb<YOUR APP ID>://authorize',
    useProxy,
  })
);
But replace the fb<YOUR APP ID> by the actual appId, prepended with fb.
In my case it's https://auth.expo.io/@derk-jan/facebook-login
Test it out, again
If you run yarn start again and open the app and press the Login button, you should now see a Facebook Login prompt. Pressing continue logs you in but shows another error:
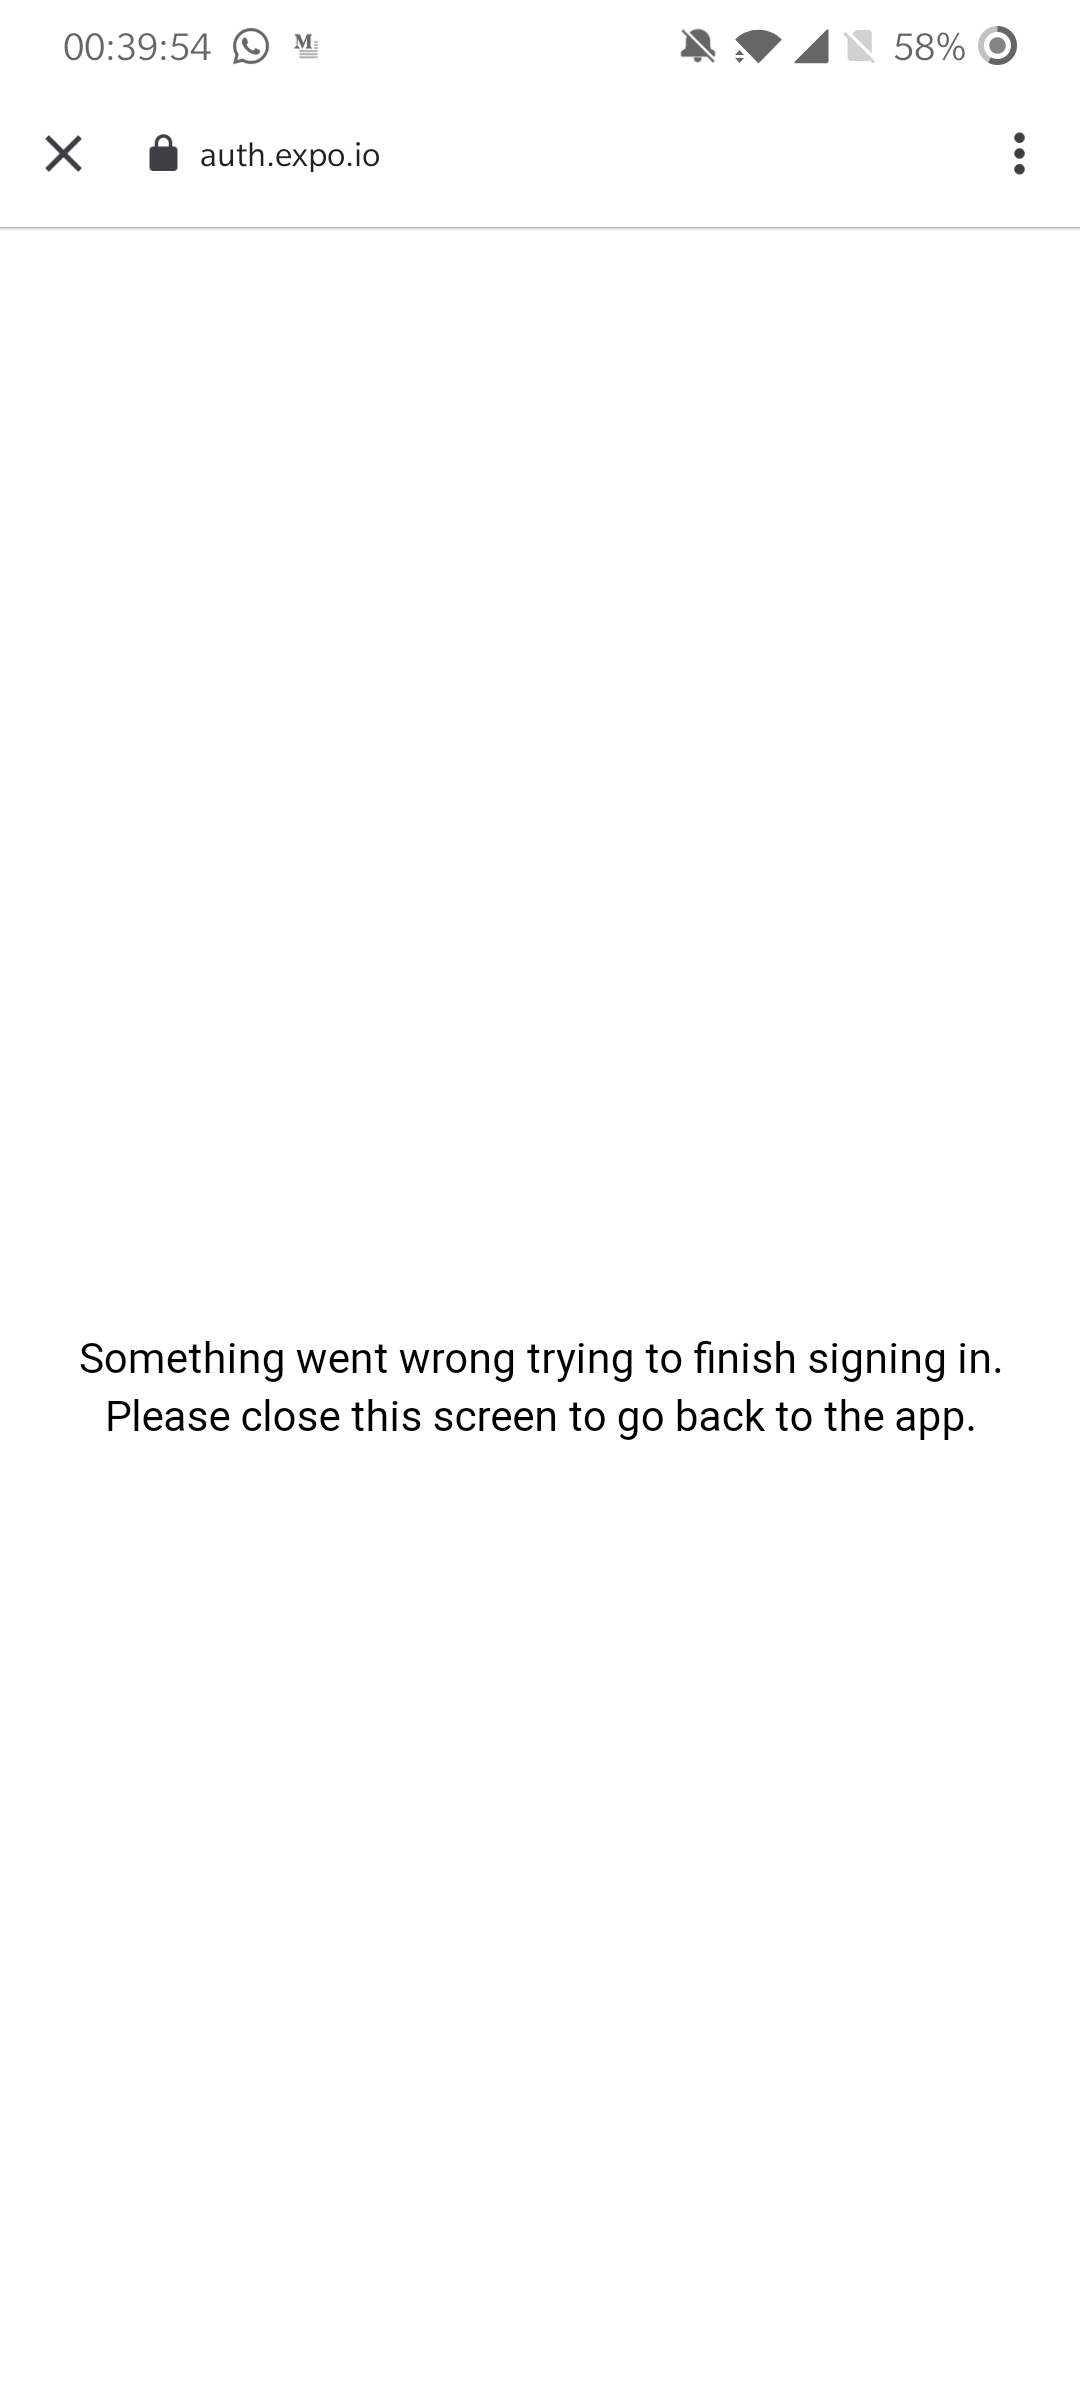
We'll fix this in a minute! Let's first test a successful flow on the web.
Open the app on the web by either using yarn start --web, or if you're still running the metro-bundler from a few lines ago, type w in the console. You can also press Run in web browser in the developer console. Press the Login button. You should see a pop-up, but if you're already logged in on Facebook in your browser (and have accepted the prompt a minute ago on mobile), it will close and return:
{
  "type": "success",
  "error": null,
  "url": "http://localhost:19006/?code=<...>&state=<...>#_=_",
  "params": {
    "code": "<...>",
    "state": "<...>",
    "_": "_"
  }
}
Great. This authenticated me on my device and browser.
Fixing the proxy message
The reason the proxy on the mobile phone fails to return the AuthSession to your app is because the returnUrl is incorrect. We correctly start the request using the proxy, but we don't tell the proxy to return via the proxy. Make the following change:
export default function App() {
  const [request, response, promptAsync] = useAuthRequest(config, discovery;

  return (
    <View style={styles.container}>
      <Button onPress={() => promptAsync({ useProxy })} title="Login" />
      <Text>{JSON.stringify(response, undefined, 2)}</Text>
    </View>
  );
}
All I've changed is pass in the useProxy value here too. Now launch the login prompt again and rejoice:
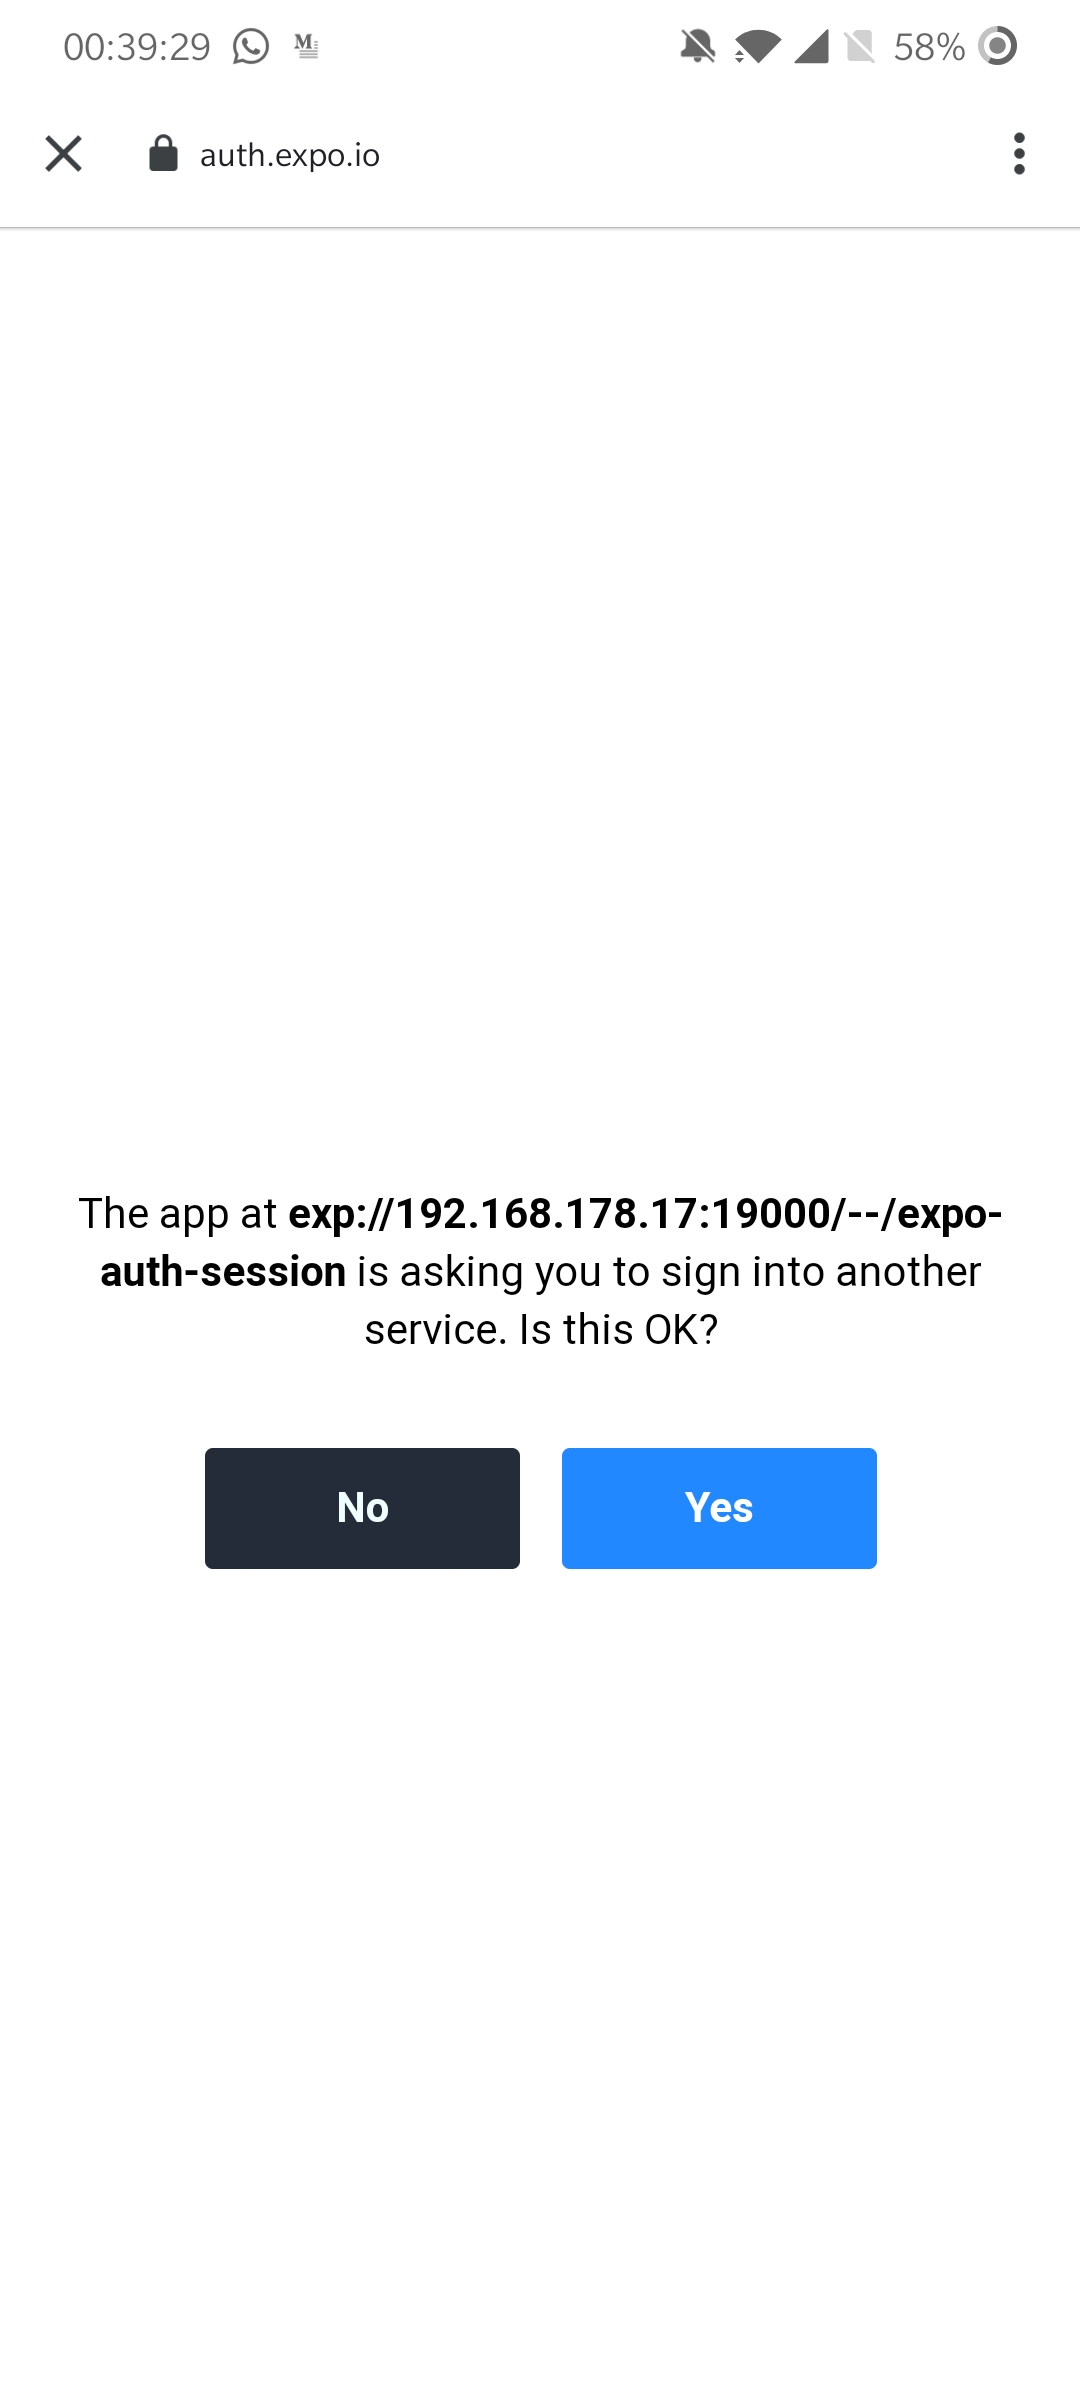
Press Yes to receive the same response shape, with similar data as on the web:
{
  "type": "success",
  "error": null,
  "url": "exp://192.168.x.y:19000/--/expo-auth-session?code=<...>&state=<...>#_=_",
  "params": {
    "code": "<...>",
    "state": "<...>",
    "_": "_"
  }
}
Press No to see what a decline or failure looks like.
Am I done?
If all you wanted to do was authenticate a user, you'd sorta be done, but you probably want to use the code you got back in order to create a user, login a user, or retrieve some data at a later moment. The data you've received is not secure. From the Facebook Documentation:
Because this redirect flow involves browsers being redirected to URLs in your app from the Login dialog, traffic could directly access this URL with made-up fragments or parameters. If your app assumed these were valid parameters, the made-up data would be used by your app for potentially malicious purposes. As a result, your app should confirm that the person using the app is the same person that you have response data for before generating an access token for them.
Now let me make the following thing very clear:
- You need to take the returned
codeand exchange it for anaccess token. - You will need to use a server secret.
- You will need to use a server to use a server secret.
- ⚠ You can not do this in your app. There is no way to bundle a secret and keep it actually secret. Again: you will need a server or some serverless code.
Exchanging code for an access token
Luckily, the code you need to run to exchange the code for an access token is not extensive and consists of a single HTTP GET call:
https://graph.facebook.com/v7.0/oauth/access_token
   ?client_id={app-id}
   &redirect_uri={redirect-uri}
   &client_secret={app-secret}
   &code={code-parameter}
Retrieve the App Secret
Go back to developers.facebook.com once more, and on the left side, in the menu, press the Settings item > Basic.
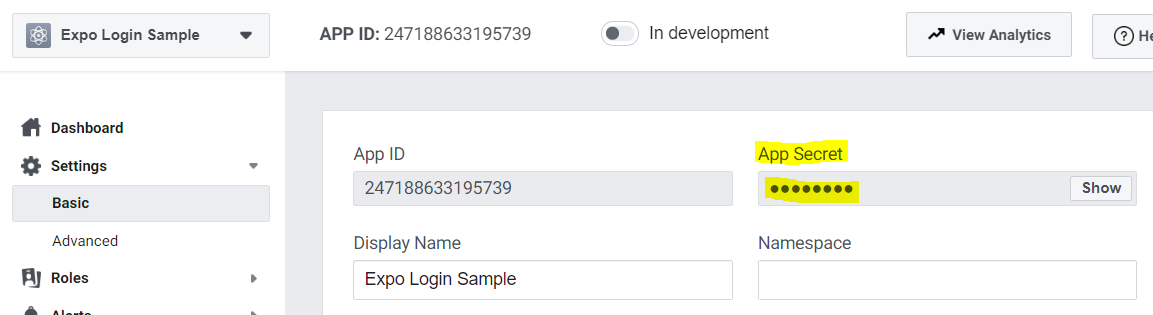
Okay great. Let's assume the value is 26d63d5f1af0470e88da15e88c128ee0. Replace the {app-secret} template variable:
https://graph.facebook.com/v7.0/oauth/access_token
     ?client_id={app-id}
     &redirect_uri={redirect-uri}
-    &client_secret={app-secret}
+    &client_secret=26d63d5f1af0470e88da15e88c128ee0
     &code={code-parameter}
Fill in the other values
You can also enter the {app-id}:
https://graph.facebook.com/v7.0/oauth/access_token
-    ?client_id={app-id}
+    ?client_id=YOUR_APP_ID
     &redirect_uri={redirect-uri}
     &client_secret=26d63d5f1af0470e88da15e88c128ee0
     &code={code-parameter}
Finally, you need to send the config['redirectUri'] and the retrieved response['params']['code'] value up to your server:
- The
configobject was the value we passed touseAuthRequest(config, discovery). You MUST use thisredirectUrito exchange thecodefor an Access Token. - The
responseobject is the second value returned fromconst [request, response, promptAsync] = useAuthRequest(config, discovery).- Check if
response['type'] === 'success' - Collect
response['params']['code'] - Make a request to your own server with these values:
- Check if
https://graph.facebook.com/v7.0/oauth/access_token
     ?client_id=YOUR_APP_ID
-    &redirect_uri={redirect-uri}
+    &redirect_uri=https://auth.expo.io/@derk-jan/facebook-login
     &client_secret=26d63d5f1af0470e88da15e88c128ee0
-    &code={code-parameter}
+    &code=<...>
Sending these values up from the client
Perhaps your server lives at your.personal.server.com and it accepts POST requests to /that-will-exchange-the-token with application/json body. If the body is valid, the server will exchange it for an access token, retrieve the user id from Facebook and use that to find or create a user on your.personal.server.com. It would then return some user data as JSON:
function App() {
  const [request, response, promptAsync] = useAuthRequest(config, discovery)

  useEffect() {
    // Was not successful
    if (!response || response['type'] !== 'success') {
      return
    }

    let stillCareAboutThis = true

    fetch(
      'your.personal.server.com/that-will-exchange-the-token',
      {
        method: 'POST',
        headers: {
          'accept': 'application/json',
          'content-type': 'application/json; charset=utf-8'
        },
        body: JSON.stringify({
          redirectUri: config['redirectUri']
          code: response['params']['code']
        })
      },
    )
    .then(handleResponse)
    .then((user) => {
      // Replace with success handing
      stillCareAboutThis && console.log(user)
    })
    .catch((err) => {
      // Replace with error handling
      stillCareAboutThis && console.error(err)
    })

    return () => {
      stillCareAboutThis = false
    }
  }, [response])


  // ...
}
The function handleResponse is not given, but should probably deal with response.ok, check the Content-Type header, and decide if it was a success or failure. The result of this function should be a resolved Promise with a user when successful, or a rejected Promise with an error. This can also be accomplished by returning a user directly, or throwing an Error.
Handling the request on the server
On the server you can use any HTTP library to accomplish this, as long as it's making a GET HTTP request. You may optionally choose to supply a Accept: application/json header, but there will not be any Content-Negotiation (this value will not be used to determine what the response looks like).
https://graph.facebook.com/v7.0/oauth/access_token
  ?client_id=YOUR_APP_ID
  &redirect_uri=https://auth.expo.io/@derk-jan/facebook-login
  &client_secret=26d63d5f1af0470e88da15e88c128ee0
  &code=<...>
The response looks like this when successful:
{
  "access_token": {access-token},
  "token_type": {type},
  "expires_in":  {seconds-til-expiration}
}
The response will explain what went wrong when it fails:
{
  "error": {
    "message": "This authorization code has been used.",
    "type": "OAuthException",
    "code": 100,
    "error_subcode": { number },
    "fbtrace_id": { string }
  }
}
Conclusion
It's not difficult to add Facebook authentication to your application, thanks to expo-auth-session. This step to step guide was up-to-date at the moment of writing, but might be outdated by the time you read it. I recommend you check the Expo and Facebook documentation when you're implementing this.